How to Start a WooCommerce Store: A Complete Step-by-Step Guide
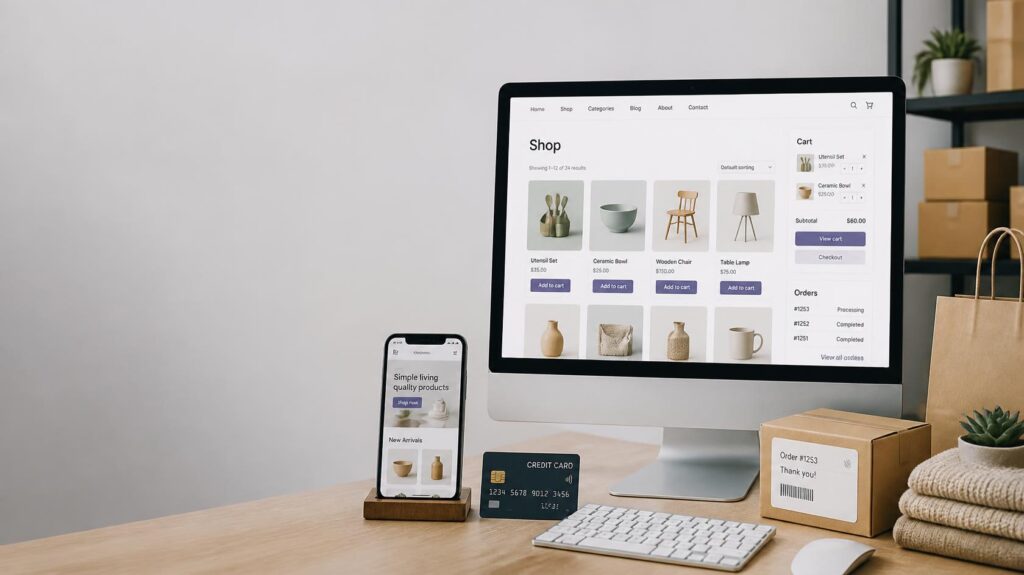
If you’re wondering how to start a WooCommerce store, the short answer is: WooCommerce turns a WordPress website into a complete e-commerce store. But WooCommerce is not a marketplace like Amazon, and it is not a fully hosted platform like Shopify — with WooCommerce, you build your own store on WordPress.
But WooCommerce is not a marketplace like Amazon, and it is not a fully hosted platform like Shopify. With WooCommerce, you build your own store on WordPress. This gives you greater control over your design, products, checkout, data, and functionality.
That control is one of WooCommerce’s biggest advantages. It also means there are more things to set up.
This guide takes you through the complete process, from choosing your domain and hosting to installing WordPress and WooCommerce, adding products, setting up payments and shipping, configuring taxes, testing checkout, and launching the store.
By the end, you should understand what WooCommerce is, whether it is right for you, and exactly what you need to do to build a working WooCommerce store.
What Is WooCommerce?
WooCommerce is an open-source e-commerce platform built for WordPress. It adds the tools needed to turn a WordPress website into an online store, including products, shopping carts, checkout, orders, payments, inventory, and other e-commerce functions.
The easiest way to understand the system is:
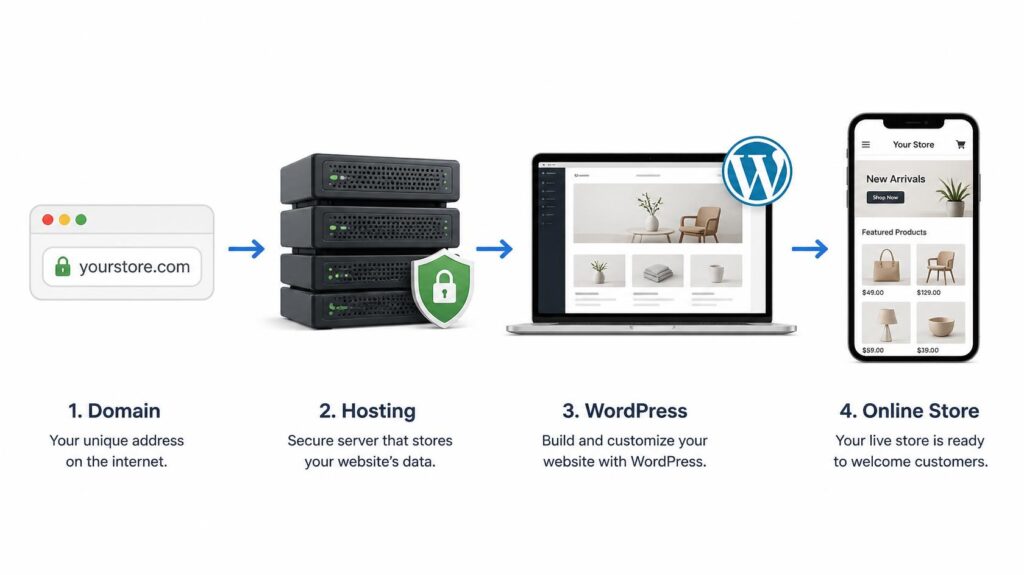
Domain + hosting → WordPress → WooCommerce → Store design → Products → Payments → Orders → Fulfillment
WordPress provides the website.
WooCommerce adds the e-commerce functionality.
You then configure the store around your particular business.
Is WooCommerce Right for You?
WooCommerce is worth considering if you want to build your own online store rather than sell primarily inside an existing marketplace.
It can be a good choice if you want control over your website, already use WordPress, want extensive customization, need to choose your own hosting environment, or plan to sell physical or digital products.
The trade-off is that WooCommerce gives you more responsibility too.
You need to manage the WordPress website, hosting, themes, plugins, backups, updates, and security.
So the basic choice is simple:
More control with more responsibility → WooCommerce
More managed infrastructure with less technical responsibility → Shopify
Existing marketplace with built-in customer traffic → Amazon
WooCommerce vs. Shopify vs. Amazon
If you are still deciding where to sell, this is the simplest comparison:
| Amazon | Shopify | WooCommerce |
|---|---|---|
| An established online marketplace | Your own hosted online store | Your own WordPress-based online store |
| Customers already search for products there | You generally need to bring customers to the store | You generally need to bring customers to the store |
| Less control over the overall marketplace experience | Strong control over store design and branding | Extensive control over store design and functionality |
| Amazon manages the marketplace environment | Shopify manages the core technical infrastructure | You manage WordPress and hosting |
| You can use Amazon fulfillment or fulfill orders yourself | You arrange fulfillment or use a fulfillment service | You arrange fulfillment or use a fulfillment service |
| Best for reaching existing marketplace demand | Best for a managed branded e-commerce store | Best for a customizable WordPress-based store |
In simple terms, Amazon gives you access to an existing marketplace. Shopify gives you a hosted online store. WooCommerce gives you the e-commerce system to build your own online store on WordPress.
You can also use more than one. A business can, for example, sell through Amazon while operating its own WooCommerce store.
What You Need Before Starting
Before installing WooCommerce, prepare the basic pieces of your business and website.
You need:
A domain name — your website address, for example.
Web hosting — the service that stores your website and makes it available online.
WordPress — the website platform on which WooCommerce runs.
A product or service — know exactly what you are selling and what the customer receives.
Product information — names, descriptions, images, prices, variations, stock information, dimensions, and other relevant details.
A payment method — decide how customers will pay and confirm that the provider supports your country and business.
A fulfillment plan — for physical products, decide how orders will be stored, packed, shipped, tracked, and returned.
Business information — your business name, contact details, store location, and any other information required for your situation.
You do not need to buy every plugin or design every part of the website before you start.
Begin with the essentials.
Step 1: Choose Your Domain Name
Your domain is the address customers use to visit your store.
For example:
yourbusiness.com
Choose something easy to remember, easy to spell, relevant to the business, and suitable for long-term use.
Before buying it, check whether the name is available and whether you can legitimately use it for your business.
Where Can You Buy a Domain?
You can register a domain through a domain registrar. Popular options include:
These services let you search for an available domain and register it.
Cloudflare Registrar, for example, offers domain registration and renewal at registry cost without its own markup.
The exact availability and cost of a domain depend on the domain extension and registrar, so check the current price before purchasing.
Should Your Domain and Hosting Come From the Same Company?
They do not have to.
You can register your domain with one company and purchase hosting from another.
For a beginner, however, using one provider for both can sometimes make setup simpler.
The important thing is to understand that your domain and hosting are two separate services, even when one company sells both.
Step 2: Choose Web Hosting
WooCommerce runs on WordPress, and WordPress needs hosting.
Your hosting provider stores your website files and database and makes your website available to visitors.
When choosing hosting, do not look only at the cheapest introductory price.
Check for:
- WordPress and WooCommerce compatibility
- Performance
- Reliability
- Backups
- Security
- SSL support
- Customer support
- Ability to upgrade as your store grows
WooCommerce itself recommends choosing hosting carefully because e-commerce websites have different requirements from a basic blog or brochure website.
Popular WooCommerce Hosting Options
Some established options you can compare include:
- SiteGround WooCommerce Hosting
- Bluehost Managed WooCommerce Hosting
- Hostinger WooCommerce Hosting
- WooCommerce hosting information
These providers offer WooCommerce-focused hosting options, but their features and pricing can change.
Do not treat any one provider as automatically “the best.” Compare the current plans, renewal terms, resources, support, and features against your actual needs.
For a small beginner store, you generally do not need the most expensive hosting plan.
Step 3: Install WordPress
After purchasing hosting, install WordPress.
Many hosting providers offer a guided WordPress installation.
Once WordPress is installed, log in to your WordPress dashboard.
Usually, you can access it through:
yourdomain.com/wp-admin
Before continuing, make sure:
Your domain works.
Your WordPress dashboard opens.
Your website loads correctly.
Step 4: Install WooCommerce
From the WordPress dashboard, go to:
Plugins → Add New Plugin
Search for→ WooCommerce
Select the official WooCommerce plugin →install it →and activate it.
WooCommerce’s current documentation explains the installation process and the setup steps that follow activation.
Once activated, WooCommerce starts its onboarding process.
Step 5: Complete the WooCommerce Setup
WooCommerce asks for information about your store, including details such as its location, industry, and the type of products you plan to sell.
After onboarding, WooCommerce provides a setup checklist.
The main setup areas include:
Adding products → Setting up payments → Customizing the store → Configuring tax → Setting up shipping where applicable → Launching
Do not simply click through the setup screens without understanding what you are configuring.
Step 6: Configure Your Basic Store Settings
Go to:
WooCommerce → Settings
Start with the basic store information.
Set your
Store address
Where the business operates.
Selling locations
The countries or regions where you intend to sell.
Shipping locations
Where you will deliver physical products.
Currency
The currency in which your products will be priced.
Customer settings
How customers can create accounts and interact with the store.
WooCommerce has additional settings for products, tax, shipping, payments, accounts and privacy, emails, integrations, and advanced options.
Do not change advanced settings simply because they are available.
Configure what your business actually needs.
Step 7: Choose a WooCommerce-Compatible Theme
Your theme controls the visual appearance of your website.
Choose a theme that works well with WooCommerce and gives customers a clear path from product discovery to checkout.
You do not need a complicated design.
Focus on:
- Clear navigation
- Readable text
- Good product images
- Consistent layout
- Mobile-friendly pages
- Easy access to the cart
- A simple checkout experience
Do not spend weeks perfecting the homepage before the actual store works.
Step 8: Create the Important Store Pages
A professional store needs more than a product catalog.
Depending on your business, create pages such as:
Home
Shop
About
Contact
Privacy Policy
Terms and conditions
Shipping information
Returns and refunds
The exact legal requirements depend on your business and location.
The important thing is that customers can easily find the information they need before buying.
Step 9: Add Your First Product
Now add the product you actually intend to sell.
Go to:
Products → Add New
Start with the basics.
Product Name
Use a clear name that tells the customer exactly what the product is.
Product Description
Explain what the product does, who it is for, its important features, and what the customer receives.
Product Image
Use a clear and accurate main image.
Product Price
Enter the selling price.
Inventory
If you want WooCommerce to track stock, configure the inventory settings.
Shipping Information
For physical products, enter the relevant weight and dimensions where required.
WooCommerce supports different product types, so the available fields can change depending on what you are selling.
Do not fill every field simply because WooCommerce provides one.
Give customers the information they actually need to make a buying decision.
Step 10: Organize Products Into Categories
If you have several products, organize them into logical categories.
For example:
Clothing → Men’s Clothing → Shirts
or:
Home → Kitchen → Storage
Categories make it easier for customers to navigate the store and make the catalog easier for you to manage.
Keep the structure simple.
Step 11: Add Product Variations
If a product comes in different sizes, colors, or other options, use product variations.
For example:
T-shirt → Size → Small / Medium / Large
Color → Black / White / Blue
Each variation can have its own stock information, price, SKU, and other settings where required.
Test every combination before launch.
A customer should never be able to select an option you cannot fulfill.
Step 12: Set Up Payment Methods
Now make it possible for customers to pay.
Go to:
WooCommerce → Settings → Payments
The payment methods available to you depend on your location, currency, business, and payment provider.
The general process is:
Choose a payment provider → create or connect the payment account → complete verification → activate the integration → configure it → test it
Do not assume that a payment provider available to another business will automatically be available to you.
Check its current requirements for your country and business before choosing it.
Step 13: Configure Shipping
If you sell physical products, you need to tell WooCommerce how orders will be delivered.
WooCommerce uses shipping zones to determine which shipping options customers see based on their location.
A simple store might have:
Local area → Local delivery
Country → Standard shipping
Selected international locations → International shipping
Then decide:
- Where will you ship?
- How much will shipping cost?
- Will you offer free shipping?
- Which delivery service will you use?
- How long will delivery take?
- Will customers receive tracking?
- What happens if an order is returned?
Do not leave shipping until launch day.
Shipping appears during checkout, so an incomplete shipping setup can stop customers from completing an order.
Step 14: Configure Taxes
Taxes are one area where you should not guess.
The correct tax treatment depends on where your business operates, where customers are located, what you sell, and the rules that apply to your business.
WooCommerce provides tax settings, but the software does not determine your legal tax obligations for you.
Use the applicable tax authority’s guidance for your business.
For complicated situations, particularly when selling across borders, seek appropriate professional tax advice.
Step 15: Configure Customer Accounts and Privacy
Decide how customers will interact with your store.
You can configure whether customers can:
- Create accounts
- Check out as guests
- View previous orders
- Manage their account information
Also review the information your website collects.
A WooCommerce store may collect names, addresses, email addresses, phone numbers, and order information.
Make sure your privacy information accurately explains how customer information is handled and meets the requirements that apply to your business.
Step 16: Configure Order Emails
WooCommerce sends emails to customers and store administrators for important events such as new orders and order processing.
Go to:
WooCommerce → Settings → Emails
Review:
Sender name
Sender email
Email design
Customer notifications
Order notifications
Make sure the business name and contact information are correct.
Then send test emails where possible.
Order emails are part of the customer experience, so they should look professional and contain accurate information.
Step 17: Set Up Inventory Management
If you sell physical products, decide how inventory will be tracked.
For each relevant product, determine:
How many units do I have?
When should the product be considered low in stock?
Should customers be able to purchase it when it is out of stock?
If variations have separate inventory, make sure stock is tracked at the variation level.
Good inventory management helps prevent selling products you do not have and over-ordering stock you do not need.
Step 18: Set Up Security and Backups
A WooCommerce store is a WordPress website, so it needs regular maintenance.
Before launch:
- Keep WordPress updated.
- Keep WooCommerce updated.
- Keep your theme updated.
- Keep plugins updated.
- Use strong administrator passwords.
- Limit administrator access.
- Maintain reliable backups.
- Use SSL/HTTPS.
- Remove plugins you no longer need.
Do not assume that installing a large number of security plugins automatically makes the store safer.
A simple, well-maintained store is easier to manage.
Step 19: Be Careful With Plugins
One of WooCommerce’s biggest strengths is its ability to be extended.
You can add functionality for payments, shipping, subscriptions, marketing, analytics, product options, bookings, and many other purposes.
But more plugins do not automatically mean a better store.
Before installing one, ask:
What exact problem does this solve?
If you cannot answer that question, you probably do not need it yet.
Every plugin adds another component that may require configuration, updates, and testing.
Start with the features required to sell your products.
Step 20: Make the Store Mobile-Friendly
Do not test the store only on a desktop computer.
Open it on a phone and check:
Does the menu work?
Are product images clear?
Can customers select variations?
Can they add products to the cart?
Can they read the checkout form?
Are payment buttons easy to use?
Can they complete the purchase?
A store that works on desktop but becomes difficult to use on mobile is not ready to launch.
Step 21: Test a Complete Order
This is one of the most important steps in the entire process.
Do not simply look at the website and decide that it is ready.
Pretend you are a customer.
1. Find a product.
2. Open the product page.
3. Choose the required options.
4. Add the product to the cart.
5. Check the price.
6. Check shipping.
7. Check taxes where applicable.
8. Go to checkout.
9. Enter customer information.
10. Complete a suitable test payment.
Then check what happened.
- Did the order appear correctly in WooCommerce?
- Did the customer receive the confirmation email?
- Did the store receive the order notification?
- Did inventory update correctly?
- Is the shipping information correct?
- Can the order actually be fulfilled?
If something fails, fix it before sending real customers to the store.
Step 22: Check Your Policies and Customer Information
Before launch, make sure customers can find important information about the business.
Review:
Shipping policy — how orders are delivered and expected delivery times.
Return and refund policy — what happens if a customer wants to return a product or request a refund.
Privacy policy — how customer information is collected and used.
Terms and conditions — the rules governing use of the website and purchases.
Contact information — how customers can reach the business.
Do not simply copy another company’s policies. Your business may have different requirements.
Step 23: Check the Checkout One More Time
Perform a final checkout review.
Look for unnecessary fields.
Ask:
Does the customer have to provide information that is not actually needed?
Check that payment methods are clear.
Check that shipping charges are visible.
Check that unexpected costs are not appearing at the last moment.
Check that the final order total is correct.
A simple checkout is easier for customers to complete.
Step 24: Launch the Store
Once the main setup is complete, make the website public.
Before launching, confirm:
The website works.
Products are correct.
Prices are correct.
Inventory is correct.
Payments work.
Shipping works.
Taxes are configured appropriately.
Emails work.
Policies are available.
Mobile pages work.
Checkout works.
Then launch.
Your first version does not need to be perfect.
It needs to work.
What Should You Do After Launch?
Launching the store is only the beginning.
Unlike Amazon, your WooCommerce store does not automatically come with a marketplace full of shoppers.
You need to bring customers to the website.
Depending on your business, that can include:
Google search
Social media
Email marketing
Paid advertising
Content marketing
Referrals
Google Shopping
Partnerships
You do not need to use every channel.
Start with one or two channels that make sense for your customers.
How Do You Know Whether the Store Is Working?
Look at the customer journey:
Visitors → Product views → Add to cart → Checkout → Purchase → Repeat purchase
If people are not visiting, you have a traffic problem.
If people visit but do not look at products, improve navigation and the homepage.
If people view products but do not add them to the cart, examine the product, images, offer, price, and information.
If people add products to the cart but do not complete checkout, investigate shipping, payment methods, unexpected costs, and checkout complexity.
If people buy but do not return, look at product quality, customer service, communication, and the overall customer experience.
Analytics should help you understand where the customer journey is breaking down.
How Much Does a WooCommerce Store Cost?
There is no single price for a WooCommerce store.
The WooCommerce software is open source, but running a complete store can involve other costs.
Depending on your setup, you may pay for:
- Domain registration
- Web hosting
- Payment processing
- Premium themes
- Premium extensions
- Shipping services
- Professional development
- Security or backup services
- Advertising
- Other business tools
That is why it is misleading to look only at whether WooCommerce itself is free.
The better question is:
What will my complete store cost to build and operate?
A small store may need only basic hosting, a domain, payment processing, and the core WooCommerce system.
A larger or more specialized store may require additional extensions and professional services.
Because provider pricing changes, check the current price directly before purchasing.
Common WooCommerce Mistakes to Avoid
Installing Too Many Plugins
You do not need a plugin for every feature you can imagine.
Start with what the store actually requires.
Choosing Hosting Only Because It Is Cheap
A slow or unreliable store can create problems once customers begin visiting and ordering.
Designing Before Configuring the Store
Do not spend days choosing colors while payments and shipping are still unfinished.
Get the store working first.
Ignoring Mobile Users
Always test the store on a phone.
Launching Without Testing Checkout
A beautiful store with a broken checkout is still a broken store.
Forgetting About Backups
Your website contains products, orders, customer information, and business data.
Maintain reliable backups.
Copying Another Company’s Policies
Your business may have different legal and operational requirements.
Create policies that accurately reflect your own business.
Trying to Perfect Everything Before Launch
Your first version does not need every possible feature.
Launch a reliable basic store, learn from customers, and improve it.
FAQ’s
Is WooCommerce free?
The core software is free, but running a real store involves costs — hosting, domain, payment processing, themes, and extensions.
Is WooCommerce good for beginners?
Yes — you don’t need to be a developer to build a store, though WooCommerce gives you more setup responsibility than a fully managed platform.
Do I need WordPress to use WooCommerce?
Yes. WooCommerce is built as a WordPress plugin and only works on top of a WordPress website.
Do I need coding knowledge?
No. A basic store can be built entirely with WordPress, WooCommerce, and standard settings—coding only helps for advanced customization. settings—coding
Is WooCommerce better than Shopify?
Neither is “better” — WooCommerce gives you more control over hosting and design; Shopify gives you a more managed, hands-off setup.
Is WooCommerce better than Amazon?
They’re different tools. Amazon is a shared marketplace with built-in shoppers; WooCommerce is the software to build your own independent store.
Can WooCommerce sell digital products?
Yes — WooCommerce supports both digital downloads and physical products.
Can I sell services with WooCommerce?
Yes, though setup depends on whether you’re selling a fixed service, a booking, a deposit, or a quote-based service.
Do I need a payment gateway?
Yes, if you want to accept online payments — the exact options depend on your country and business.
Do I need shipping if I sell digital products?
No — shipping only applies to physical products; digital products are delivered online.
Can I change my WooCommerce theme later?
Yes, but test the store carefully after a major theme change since it can affect layout and functionality.
How many plugins should I install?
There’s no set number — install only what your store actually needs, not the maximum available.
The Complete WooCommerce Setup in One View
If you want to remember the entire process, it is
Choose your domain
Choose reliable hosting
Install WordPress
Install WooCommerce
Complete the WooCommerce setup
Configure store settings
Choose and customize your theme
Create important website pages
Add products
Create categories and variations
Set up payments
Configure shipping
Review the taxes.
Configure customer accounts and privacy
Set up order emails
Configure inventory
Secure and back up the website
Keep plugins to the essentials
Test the store on mobile
Place a complete test order
Check checkout, emails, inventory, shipping, and payment
Launch
Bring customers to the store
Measure what happens
Improve the areas where customers are getting stuck
Final Thoughts
Starting a WooCommerce store is not difficult because there is one complicated step.
It can feel difficult because there are several pieces that have to work together.
You need WordPress for the website, WooCommerce for the e-commerce functionality, a domain and hosting to run the site, products to sell, payment methods to collect money, shipping and fulfillment for physical orders, and a reliable checkout that works from beginning to end.
The process becomes much easier when you complete those pieces in the right order.
Do not start by installing twenty plugins.
Do not spend weeks perfecting the homepage before testing checkout.
Do not launch before placing a test order.
Build the basic store first. Make sure a customer can find a product, understand it, pay for it, and receive what they purchased.
Then improve the store based on what real customers tell you.
That is how a WooCommerce website becomes a working online business—not by adding more features, but by making the entire buying process simple and reliable.
Official WooCommerce Resources
For technical settings that can change over time, use WooCommerce’s current documentation alongside this guide:
WooCommerce Installation Guide
WooCommerce Settings Documentation
WooCommerce Shipping Zones Guide