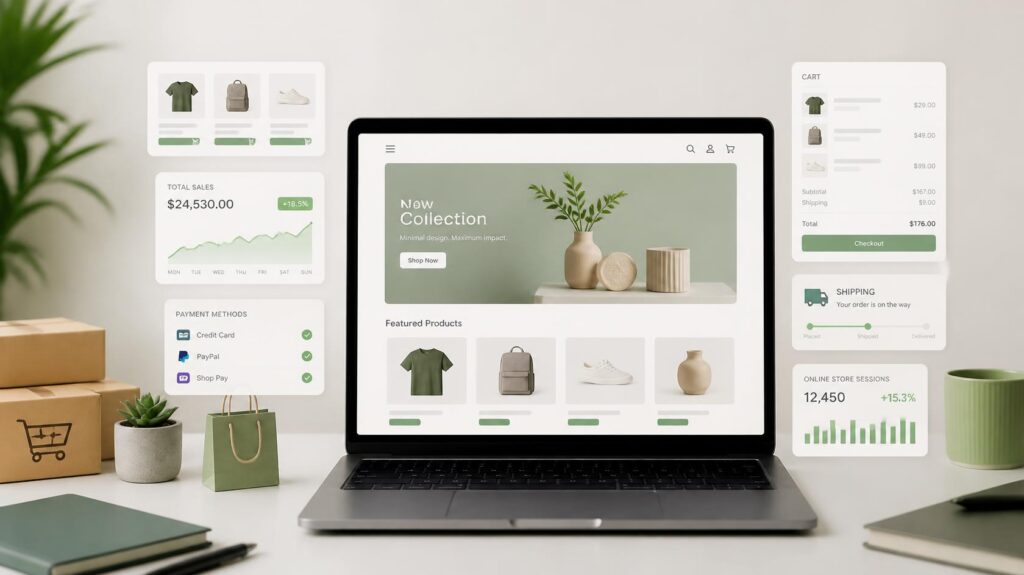
To start a B2B wholesale store on Shopify, select your architecture (B2B apps on standard plans or native B2B on Shopify Plus), upload your product catalog, set up tiered pricing with Minimum Order Quantities (MOQs), enable Net payment terms, and gate wholesale pricing behind a customer login portal.
Running an e-commerce business requires aligning your technology with your distribution model. While direct-to-consumer (D2C) brands prioritize quick impulse purchases and fixed retail pricing, business-to-business (B2B) enterprises operate on contract pricing, minimum order thresholds, deferred payment terms, and recurring fulfillment cycles.
Shopify has expanded beyond its retail origins to support high-volume B2B operations. Whether launching a standalone wholesale hub or adding a password-protected B2B portal to an existing retail website, structuring your store correctly ensures smooth order management and healthy profit margins.
Table of Contents
Comparing E-Commerce Models: B2B vs. B2C vs. D2C
Before selecting software configurations or design templates, clarify how your distribution model dictates your website’s functionality.
| Model | Target Audience | Order Volume | Pricing & Payment |
|---|---|---|---|
| B2B | Corporate Clients, Retailers, Wholesalers | High volume (Master cases) | Tiered wholesale pricing, Net 30/60 terms, Wire/PO |
| B2C | Individual End-Users | Low volume (1–3 items) | Fixed MSRP, immediate credit card or mobile pay checkout |
| D2C | Direct Consumers (No Middlemen) | Single units | Brand-owned pricing, direct customer relationship |
Business-to-Business (B2B)
In a B2B model, products are sold in bulk to other commercial entities for resale, industrial use, or corporate operations. Transactions involve larger order volumes, variable pricing catalogs based on client accounts, and formal invoicing schedules rather than immediate point-of-sale payments.
Business-to-Consumer (B2C)
The standard online retail framework. Merchants market finished goods to individual consumers at fixed retail prices (MSRP). The buyer pays immediately at checkout using standard payment gateways like credit cards or digital wallets.
Direct-to-Consumer (D2C)
A specific subset of B2C where manufacturers or brand owners market and ship products directly to end consumers, bypassing third-party wholesalers, distributors, or retail partners. D2C allows brands to control the customer experience and protect profit margins, but it requires managing consumer-facing acquisition channels.
Why Brands Choose Shopify for B2B Wholesale
Historically, B2B sales depended on manual PDF line sheets, phone orders, physical trade shows, and back-and-forth email negotiations. Modern commercial buyers expect the convenience of consumer e-commerce combined with the flexibility of custom commercial contracts.
Platform Comparison: Shopify vs. Third-Party Marketplaces
While selling on third-party commercial marketplaces (such as Amazon Business) provides instant access to existing buyer networks, it presents trade-offs:
- Marketplace Channels (e.g., Amazon Business): Offer high search traffic but impose strict commission fees, limit direct access to client contact data, and place your products directly alongside competing suppliers.
- Independent Storefronts (e.g., Shopify): Function as a dedicated corporate asset. You maintain total ownership of buyer relationships, contract customization, site analytics, and branding.
Many growing enterprises adopt a hybrid approach: using marketplaces for buyer discovery while driving core client reorders through a dedicated Shopify portal.
Pre-Launch Checklist: Essential Assets and Policies
Gathering operational data before starting backend configuration prevents delays during the store setup process.
- Tax Identification & Business Documentation: Obtain state reseller tax certificates, EIN documentation, and local business licenses required to verify trade buyers.
- Wholesale Pricing Matrix: Establish Minimum Order Quantities (MOQs) (e.g., $500 cart minimum or 24-unit case pack requirements) and tiered volume discounts (e.g., 10% off at 50 units, 25% off at 200 units).
- Product Data & Technical Specifications: Prepare CSV files containing SKU numbers, master case weights, pallet dimensions, Harmonized System (HS) codes for customs, and high-resolution packaging photography.
- Credit Policy & Payment Terms: Define criteria for extending deferred payment schedules (such as Net 15, Net 30, or Net 60) to creditworthy accounts.
Step-by-Step Guide to Setting Up Your Shopify B2B Store
Follow this step-by-step framework to launch a functional, secure wholesale portal.
Step 1: Select Your Store Architecture
Choose the store structure that aligns with your current budget and operational scale:
- The Blended Store Model (Standard Shopify Plans): A single Shopify installation serves both retail consumers and wholesale buyers. Public visitors see retail pricing. When approved business accounts log in, third-party B2B integration apps (such as Wholesale Gorilla, SparkLayer, or Wholesale Pricing Discount) grant access to wholesale price catalogs and bulk order forms.
- Native B2B Architecture (Shopify Plus): Designed for enterprise operations. Managed natively from the Shopify Admin panel, this configuration supports multi-location company accounts, native price lists, custom payment rules, and dedicated buyer permissions without requiring third-party tools.
Step 2: Configure a High-Efficiency Store Theme
B2B buyers prioritize speed, clarity, and ease of navigation over complex visual animations.
- Navigate to Online Store > Themes in your Shopify Admin.
- Select a responsive, fast-loading theme (such as Dawn or a specialized catalog-focused layout).
- Open the Theme Customizer to apply corporate logos, brand typography, and high-contrast color schemes.
- Structure your header navigation to include clear paths for:
- Product Catalogs (Categorized by SKU or Industry Application)
- Wholesale Account Registration
- Bulk Order Matrix Forms
- Corporate Contact & RFQ (Request for Quote) Pages
Step 3: Upload Product Catalogs and Case Pack Structures
B2B listings require detailed specifications to help purchasing managers confirm product compatibility and freight requirements.
- Navigate to Products > Add Product (or import via CSV).
- Input comprehensive product descriptions, including material composition, country of origin, warranty terms, and master case dimensions.
- Assign unique SKUs to every product variation and set up inventory tracking across all fulfillment centers.
- Group items into logical collections (e.g., Raw Materials, Bulk Fasteners, or Retail-Ready Counter Displays) and link them to your primary site navigation.
Step 4: Implement Buyer Gatekeeping and Account Verification
Protect wholesale margins by gating your wholesale catalog behind an account approval process.
- Create an Application Page: Go to Online Store > Pages and publish a dedicated application form requesting:
- Registered Business Name & Website URL
- Tax ID / Reseller License Number
- Estimated Monthly Spend
- Shipping/Receiving Dock Availability
- Apply Account Tags: In the Customers section of the Shopify Admin, tag approved accounts (e.g.,
Wholesale-VIPorDistributor-Gold). - Gate Access: Configure your settings to ensure unauthenticated visitors see retail prices or a “Login to View Wholesale Rates” prompt.
Step 5: Establish Tiered Pricing, MOQs, and Quantity Increments
Structure your catalog to enforce profitable order sizes and incentivize bulk purchasing:
- Minimum Order Quantities (MOQs): Require minimum order totals (e.g., $500 minimum or 20 units per order) to ensure wholesale orders cover fulfillment and freight handling costs.
- Volume Price Breaks: Set up tiered pricing tables on product pages to encourage larger orders:
- 10–49 units: $20.00 / unit
- 50–199 units: $16.00 / unit
- 200+ units: $12.50 / unit
- Case Pack Constraints: Set quantity increments so items can only be ordered in complete case counts (e.g., multiples of 6, 12, or 24 units), streamlining warehouse handling.
Step 6: Install a Bulk Order Matrix Interface
B2B buyers reordering dozens of line items need a streamlined matrix layout to build orders quickly without loading individual product pages.
- Add a single-page matrix order form to your store layout.
- Display a grid where logged-in buyers can enter quantities across multiple variant fields (e.g., Small, Medium, Large) on a single screen.
- Add a single “Add All Items to Cart” button to allow instant multi-SKU additions.
Step 7: Configure B2B Payment Gateways, Invoicing, and Tax Rules
Corporate purchasing departments rely on structured accounting workflows rather than immediate point-of-sale credit card charges.
- Navigate to Settings > Payments.
- Enable Manual Payment Gateways: Activate options for Bank Wire Transfer (ACH), Purchase Orders (PO Number collection at checkout), and Company Check.
- Assign Net Payment Terms: Set up deferred payment options (Net 15, 30, or 60) for pre-approved corporate accounts. This generates a draft invoice upon checkout, giving the client an agreed timeframe to complete payment.
- Apply Tax Exemptions: Update customer profiles for verified resellers to automatically waive local sales tax at checkout upon validation of their reseller certificate.
Step 8: Connect Your Custom Domain and Perform Test Orders
Before launching your wholesale portal, verify DNS settings and test the buyer workflow:
- Go to Settings > Domains and connect your corporate domain or subdomain (e.g.,
wholesale.yourbrand.com). - Execute a Test Order:
- Create a test customer account and assign it a
Wholesaletag. - Open an incognito browser window, log in as the test customer, and confirm that retail pricing is hidden and wholesale rates display accurately.
- Verify that volume pricing discounts calculate correctly in the cart and complete a test checkout using a Purchase Order number.
- Go to Online Store > Preferences, disable password protection, and publish your store.
Post-Launch Operations and Scaling Strategies
Launching your portal is the first step. To build a sustainable B2B e-commerce operation, focus on these ongoing operational practices:
- Integrate Backend Accounting & ERP Systems: Sync your Shopify store with enterprise accounting software (like QuickBooks Online, Xero, or NetSuite) to automate invoice generation, inventory tracking, and payment reconciliation.
- Convert High-Volume Retail Buyers: Review retail order history regularly. When individual retail accounts place consistent or high-volume orders, reach out to invite them to apply for wholesale account status.
- Enable One-Click Reordering: Provide repeat buyers with access to past order histories inside their account portal, allowing them to duplicate prior purchase orders in a few clicks.
FAQs
Is Shopify Plus required to run a B2B store?
No. Standard Shopify plans (Basic, Shopify, and Advanced) can run effective B2B wholesale portals using third-party B2B apps. Shopify Plus offers built-in, native B2B functionality suitable for enterprise-level operations managing complex corporate accounts.
Can I run retail and wholesale on the same Shopify website?
Yes. Using account tagging and gated access, a single “blended” store can display standard retail pricing to general visitors while unlocking wholesale pricing, bulk order forms, and payment terms for logged-in, verified business clients.
How do I verify tax-exempt status for wholesale buyers?
Collect a digital copy of the buyer’s state reseller certificate or business license during the wholesale registration process. Once verified, update their customer profile in Shopify to automatically waive sales tax on their orders.
Expanding Your Business Model
Pairing a dedicated B2B e-commerce platform with the right commercial strategy is key to long-term profitability.
To explore complementary business models, service structures, and growth tactics, read our detailed overview of proven B2B business ideas and service models.